An easy, all-butter pie crust recipe to impress your friends and family with a flaky, homemade crust this holiday season or any season. Grab a shortening crust recipe from me over at TidyMom.
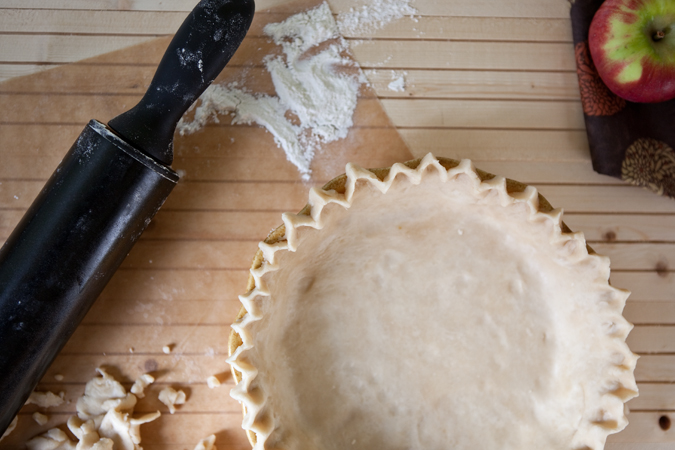
I recently had the opportunity to make pie at J.M. Smucker’s in Ohio, (did you know they have both Pillsbury and the White Lily flour?) but before that even, I have been putting the finishing touches on the pie chapter in my book. There has been a lot of pie around these parts as of late, and I’d love to share some of it with you, starting with the crust.
What Type of Crust
Before we get started, let’s think about the pie you’re making, as this will help determine the crust you want. Where my fresh strawberry and rhubarb pie had a cookie crust that was baked, several cream pies use a cookie crumb crust. Then there is the classic pastry crust, made with flour and a bit of fat.
Pastry Crust Fats
For a pastry crust, one of the main components is the fat you’ll be using, so determining which you prefer is the next step. This may be a personal preference, or it may be determined by what kind of crust your mom or grandma made when you were growing up.
- shortening – any fat that is solid at room temp, but for use here, vegetable shortening
- butter – it comes from cows
- lard – rendered and unrendered pig fat
- a combination – a combination of butter and lard/shortening
Making the Crust
For our purposes, we’re using butter and elbow grease to make our pie crust. You can see my food processor method over on TidyMom today as well. There are benefits to both methods. The food processor is a bit quicker, but there is the downfall of cleaning it. Plus, not everyone has a food processor, and maybe your food processor is in use for something else during your holiday baking session.
Kiera is coming along for the ride to demonstrate how easy it is to make pie crust. You’ll barely notice her, though, because her clothing choice matches the decor. (She looks excited to be here, right?)
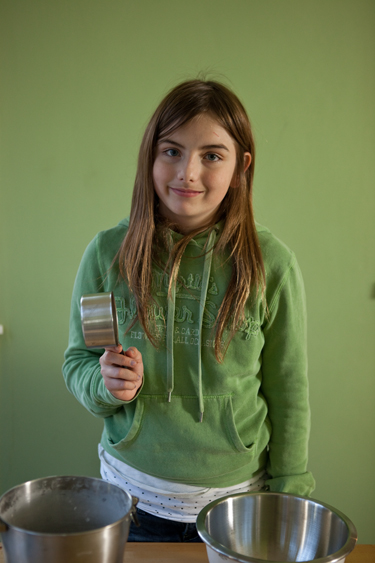
Measuring the flour.
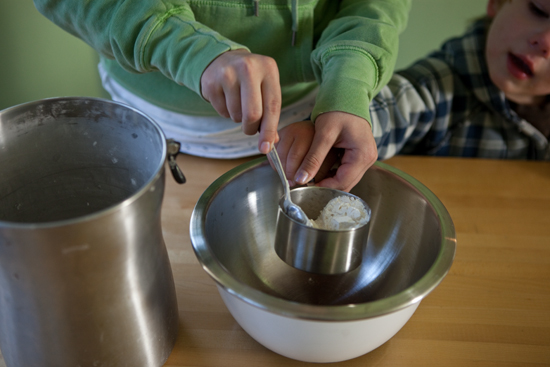
The first step in making pie crust is the flour, and if you aren’t measuring your flour correctly, you’ll be getting less-than-ideal results in the final product. The most common mistake in measuring flour is to dig your measuring cup directly into the container and scooping out a big, ol’ scoop. However, this packs the flour down and can mean you have too much flour in your dough.
Instead, scoop the flour with a spoon and add it to the measuring cup, then leveling with a flat edge once the cup is full. The other method of getting an accurate flour measurement is to weigh the flour on a kitchen scale. One cup of all-purpose flour should weigh 125 grams. Other flour varieties weigh different amounts, though. Cake flour, wheat flour, bleached all-purpose, wheat pastry flour, all have different gram measurements. A conversion chart can help you figure out the flour type and volume conversion.
Cold ingredients.
Pie crust is flaky because there are pieces, actual pieces of butter in it, rolled into thin, flat sheets that when baked create the flaky layers. You can imagine, then, that melted butter would not result in flaky layers.
Therefore, it’s important to keep the butter cold to prevent it from melting. To do this, it’s best to start with really cold butter chunks. Cut the butter into chunks and then store it in the freezer for a few minutes while you get the rest of your ingredients ready. Some people go as far as to chill the bowl and the flour as well. Couldn’t hurt, right?
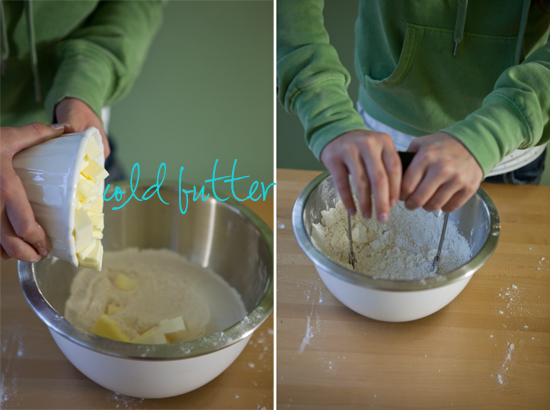
Butter chunks.
When mixing in the butter, use a long-tined fork or a pastry blender. A pastry blender is preferred because it makes cutting the butter up quick and easy, but I noticed recently that it’s near impossible to purchase one in stores if you don’t already have one. (I snapped a blade of mine off when it got stuck at the back of a drawer and needed to replace it.) If you get in a pickle, a fork works just as well.
You want to aim to get the butter into small bit, but don’t look for all of it to be tiny and flaky. Those chunks of butter are the pieces that will be rolled into thin layers in your dough. Butter chunks = flaky layers. Add in just enough icy cold water to get your dough to stick together. It should still look clumpy and not like a ball.
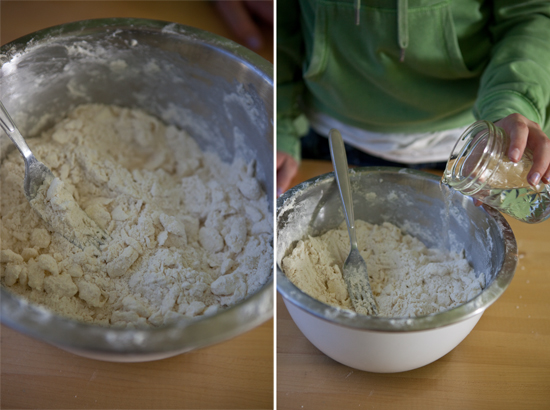
Let it rest.
Use your hands to squish those clumps together and then form two equal discs. Putting the dough in disc shape gives you a head start on that circle you’re looking to roll it into after it rests.
Pack your dough package in the refrigerator for at least an hour before you roll it out. This will help all those butter pieces to be nice and firm again, and it will give you time to prepare your pie filling. (You could also store it in the refrigerator for a few days or in the freezer for longer.)
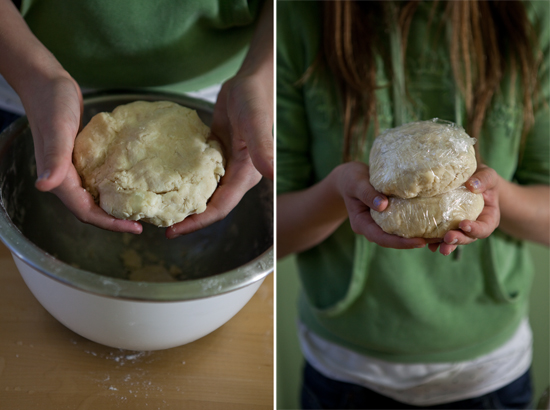
The only steps left are rolling out your pie crust and placing it ever so gently into your pie plate. Be sure to use as little flour as possible (you could even roll between two sheets of parchment), and work quickly so the butter doesn’t melt, which would do away with those flaky layers. Then bake and fill with whatever pie your heart desires.
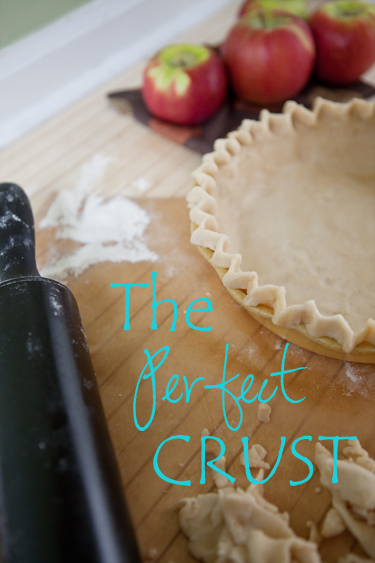
Pie, pie and more pie!
::Apple Pie Cheesecake | Food for My Family
::Fresh Strawberry and Gingered Rhubarb Pie | Food for My Family
::Cranberry Apple Deep Dish Pie | goodLife {eats}
::Fresh Coconut Cream Pie | Sophistimom
::Maple Pecan Pie | Simple Bites
::Pumpkin Pie with Cardamom Cream | The Family Kitchen
::Simple Berry Pie | Cheeky Kitchen
Are you making pie this season? What kind of pie is your personal favorite?
1 tablespoon sugar (omit for savory filling)
1 teaspoon salt
1 cup (2 sticks) very cold unsalted butter, cut into small pieces
4-6 tablespoons ice cold water
In a cold, large bowl, mix together flour, salt and sugar. Add in butter pieces and cut into the flour using a pastry blender or the tines of a fork until the crumbs range in size from small to pea-sized.
Sprinkle 2 tablespoons of water over the dough and fold in quickly. Continue folding in one tablespoon of water at a time until the flour and crumbs are just moistened and start sticking together in larger clumps. (Note: You may not use all of the water to achieve this.) Use your hands to pull the dough together and form two equal discs. Wrap in parchment or plastic wrap and let it rest in the refrigerator for at least an hour.
Roll the dough out on a lightly floured surface and transfer to your pie plate. Bake according to your recipe directions.
Makes (2) 9″ pie crusts.
This recipe is a standard pate brisee recipe that can be found everywhere.

All butter pie crust is my favorite and this recipe looks so easy and perfect!! Totally bookmarking this for when I get my Thanksgiving bake on!! Love seeing your sweet kiddos helping out in the kitchen 🙂
She’s sweet, and a budding pie maker to be sure. Nice work, Kiera!
Thank you so much for this recipe! Just in time to save me from the normal hideous mess I try to pass off as crust!
Such a sweet girl – definitely following in your footsteps 🙂
I’m all for anything that means less stuff to clean up afterwards! And I like to get my hands in there anyhow.
Love to see Kiera using a pastry cutter! I far prefer this method over using a food processor which tends to overwork the dough unless you’re very, very careful. Plus you’re right — they can be such a pain to clean up.
How do you make the fancy edges on the crust?
Hi, Kathy. I had another request for this, so I’ll put something up about it this weekend. 🙂
Look at that little cutie and her pie crust! I love her.
Perfection! Homemade pie crust is totally worth it!
I just commented on your shortening pie crust over at TidyMom… They both look fabulous! Though, this one is a little more my speed… I typically opt for all butter. 🙂
This IS the perfect pie crust recipe! I use the same one too (although I cut down on the sugar to a teaspoon because I usually freeze big batches, and don’t want to worry about pulling out a sweet crust when I’m doing chicken pot pie). Totes foolproof, right?!?!
Chilling the butter! That should help in my next pie crust endeavor. And what a great hands-on recipe with kids, because who doesn’t love the feeling of squishing dough between your fingers?
I’m in charge of dessert for Thanksgiving and was considering a store *gasp* bought crust for my pie. But not now…I’m going to use this awesome recipe! Printing now…
I am bound and determined to master pie crust making! I’ll admit it hasn’t gone perfectly for me in the past, but I know it just takes practice. I’m motivated – thanks for the hints!
I love a great all butter pie crust 🙂 wonderful tips.
This is my favorite pie crust; despite the preponderance of users crying for lard; I just like the idea of butter so much more. Can’t want to see you explain the crimping on your crust. I have been doing it for so long that trying to explain to someone is harder than I imagined! I’ll send them here.
I’m not sure I know how to find a new article posted. Once you post your article on crimping crust, would it be possible to post a link to it on comments here? I’ve bookmarked this page and will be checking back! ;o)
The crust crimping tips are located in the pear pie post. 🙂 Thanks!!
Great post! I love that you’ve included photos. I’ve been making pie crust for a hundred years (it seems like) and it’s hard to explain so those pics are terrific. Haven’t ever made an all butter crust so I really want to try this one! Thanks…
I have a pastry blender but I really do like using a food processor. Just have to be sure not to over “process”.
Your daughter is gorgeous! I just saw this over at Cheryl’s and I can’t wait to give it a try. Pie’s have scared me for years but now I’m trying them again ;D
I will conquer pie crust! I feel like this is the perfect tutorial for me — I have read several, but for some reason, I feel more confident after reading this one! Will this kind of crust work for tarts as well?
Yes, perfectly! Let me know if you have any questions along the way!
Hello,
I “stumbled” onto your blog through Stumble Upon, and I’m so glad I found it. I’ve been looking for a recipe for this type of crust all week–and just in time for Thanksgiving tomorrow. I like that you included your children in the photos, which make the step-by-step images for making the crust unlike anyone else’s recipe. Also, thanks for the explanation of the “fats”: I definitely don’t want lard in my pie.
Thanks for sharing this great recipe, and Happy Thanksgiving!
Alaiyo
amazing information
I know this might be ridiculous but which crest has the least amount of fat!!!
hi. im going to use pie crust this year for my pumpkin pies. i always use the recipe in bread machine. but it taste like greese. so im going to try yours.
Hi I absolutely love this crust it is my go to crust all the time now. About how long would you say this crust would last in da fridge. Because I found one tucked away that I made a couple weeks ago but I don’t wanna use it if it isn’t any good.